Help overview/Events
Event settings
For each event you can choose one of three statuses: Invisible, Draft, or Public.
Event status
For each event, you can choose one of three statuses. The active status does not have a white background. Select a status by clicking its name.
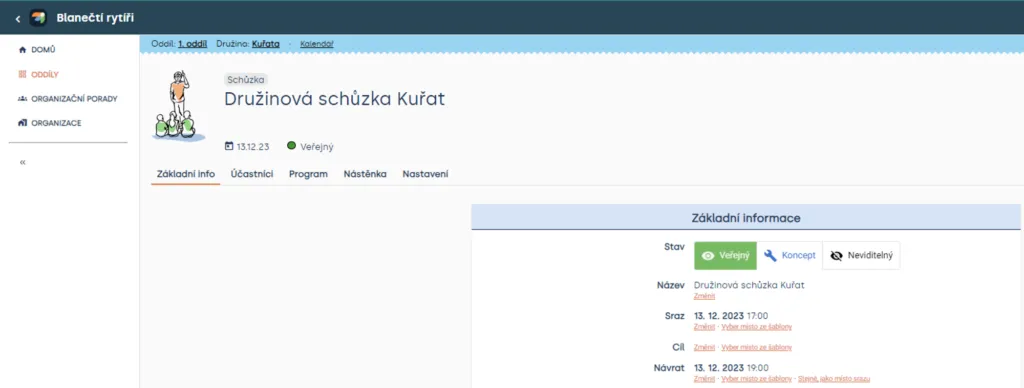
Section: Unit > Calendar > Selected event
Here is an explanation of statuses:
- Invisible – For members, parents, or visitors, this event is invisible and won’t be found in any list (or Google Calendar).
- Draft – For members, parents, or visitors, this event is visible; they only see the date and event name.
- Public – For members, parents, or visitors, this event is visible and they see all necessary information.
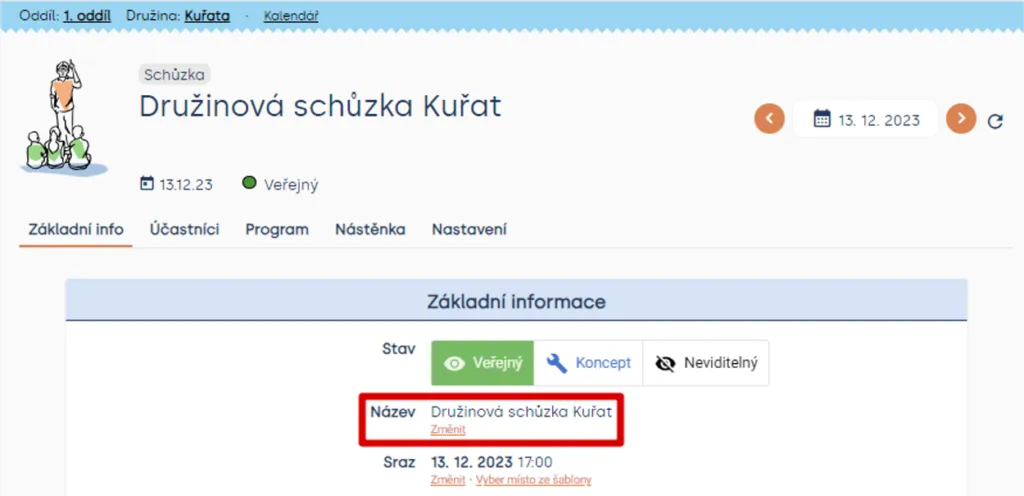
Event name
When creating a meeting, the event name is automatically set to “Meeting”. Click the Change button to change the event name. Save the change using the Save button.
Meeting point and return
You already set the meeting point and return time and date when creating the event; you can change them at any time in event details.
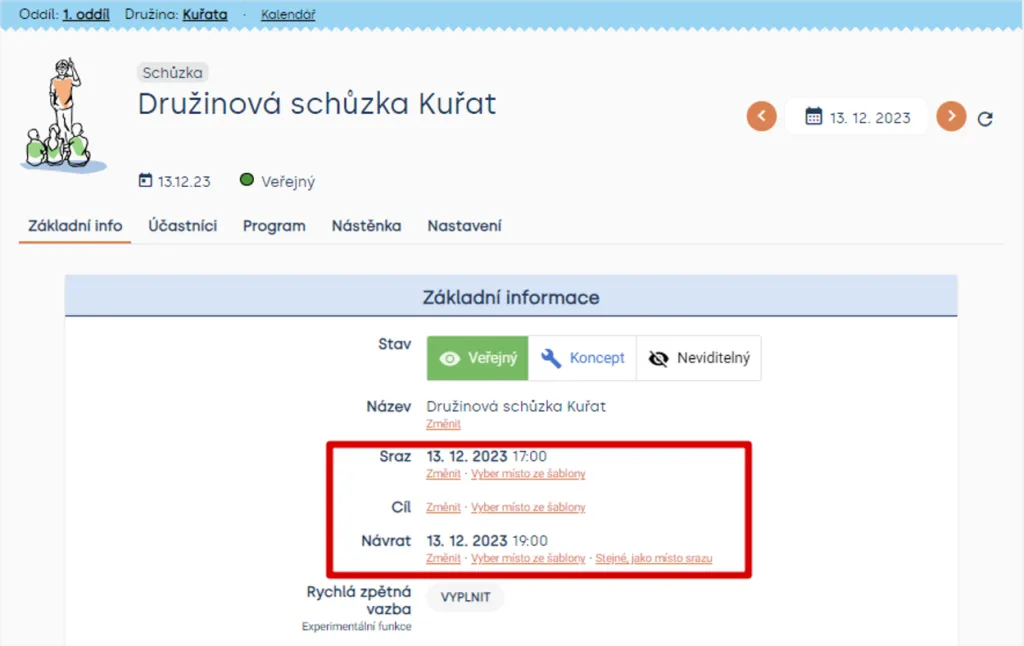
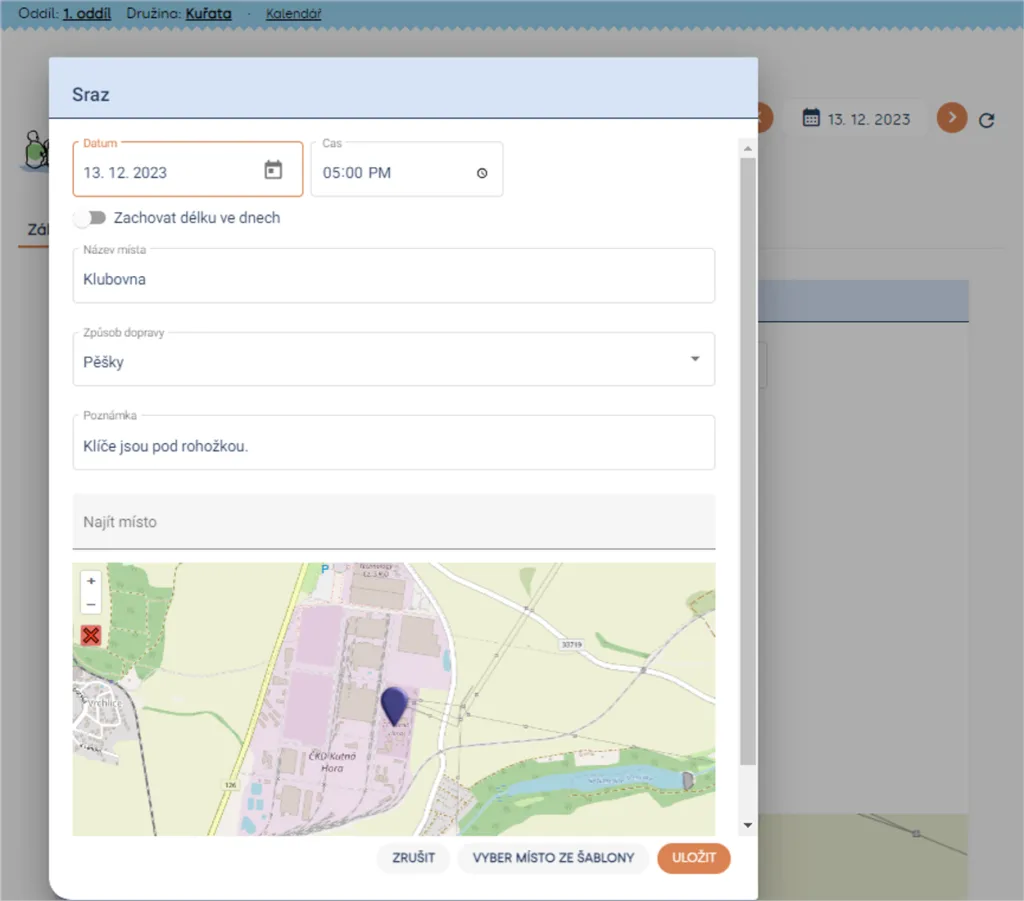
Meeting point and return settings are exactly the same. Not only can you change the time, but you can also set the location here. When you type a location name, you can also mark it on the map. In the left corner of the map, you will find zoom in (plus [➕]) and zoom out (minus [➖]) buttons. Click on the map to place a pin and mark the location. You can cancel marking using the button in the left corner of the map (cross [❌]). You can also select transportation method and add a note to the location.
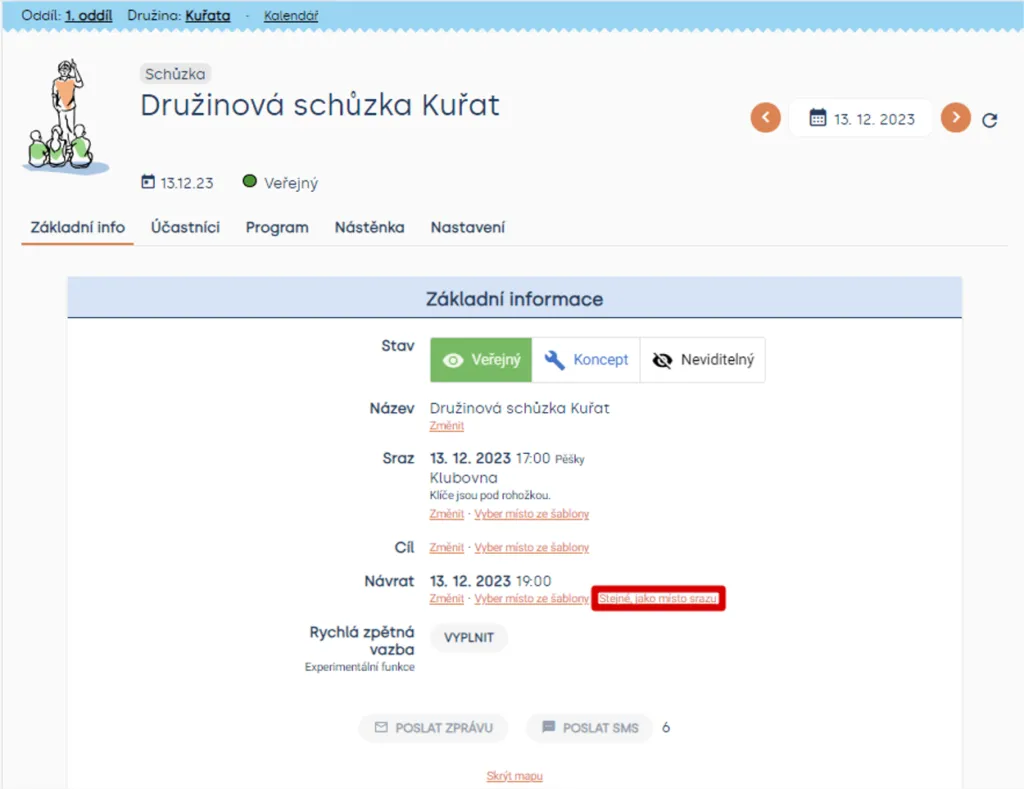
You can simplify setting the return location by clicking “Same as meeting point location”, which transfers information from the meeting point to the return. When you change something at the meeting point, you must click “Same as meeting point location” again.
Tip Use location templates for entering meeting point locations.
Destination
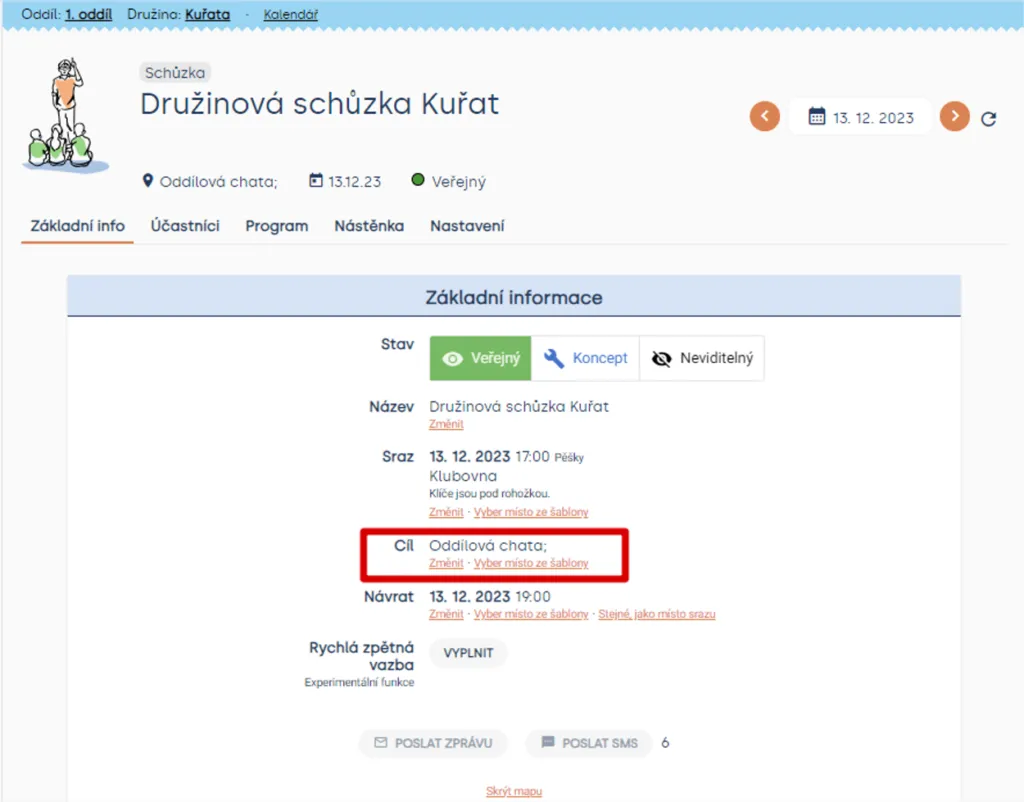
Destination options only let you change the destination name, add a note, and mark the destination on the map by clicking anywhere on the map. In the left corner of the map, you will find zoom in (plus [➕]) and zoom out (minus [➖]) buttons. When you click on the map, you place a pin where you specify the location. You can cancel marking using the button in the left corner (cross [❌]). You can also select arrival location and add a note to the location.
Tip Use location templates for entering meeting point locations
Quick feedback
Quick feedback can be filled in on any event where you have attendance filled in.
If you don’t have attendance filled in, Levitio offers to fill it in quickly.
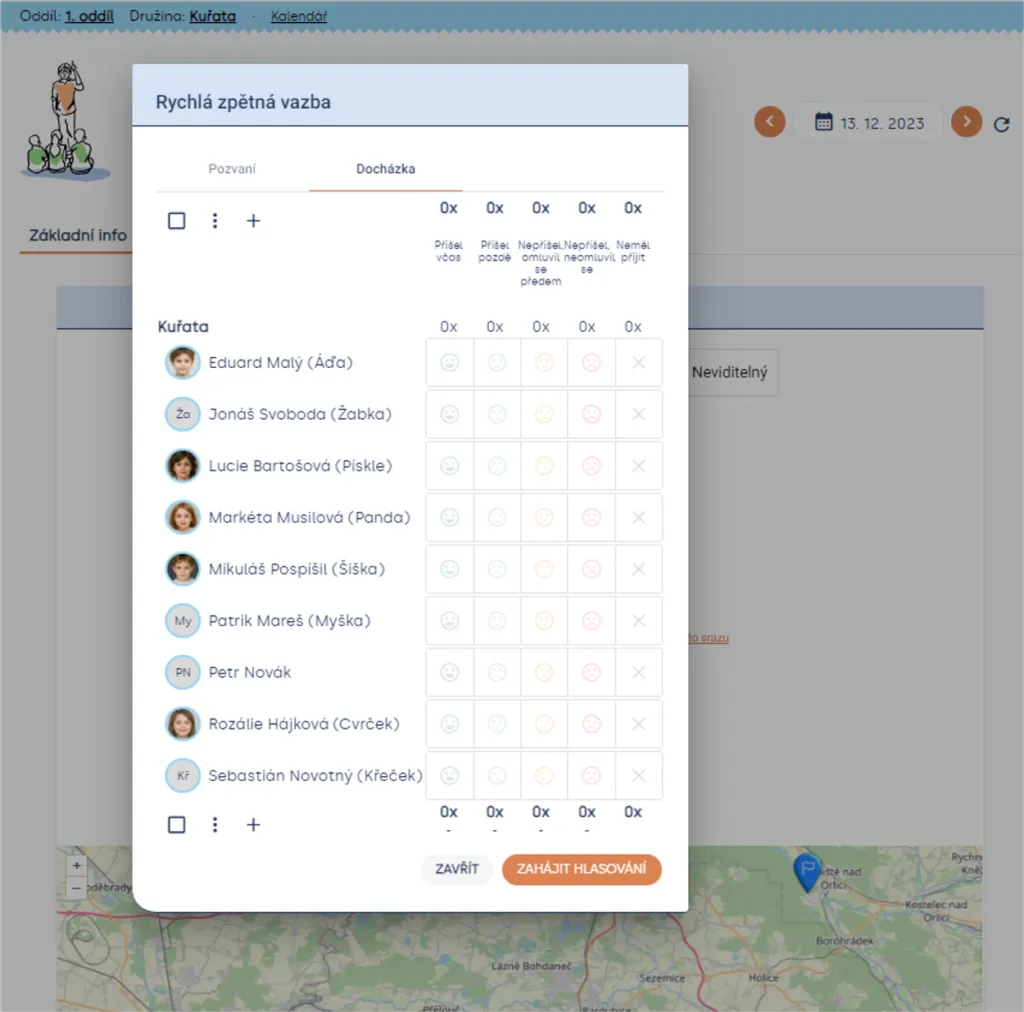
Clicking “Start voting” starts voting.
Then when a member clicks the “Vote” button, two options appear:
- By clicking a star (⭐), they indicate how many stars they would give the event. Stars are counted from left to right (clicking the fourth star, the member rated the event four stars)
- The member clicks “I don’t want to vote” and abstains from voting.
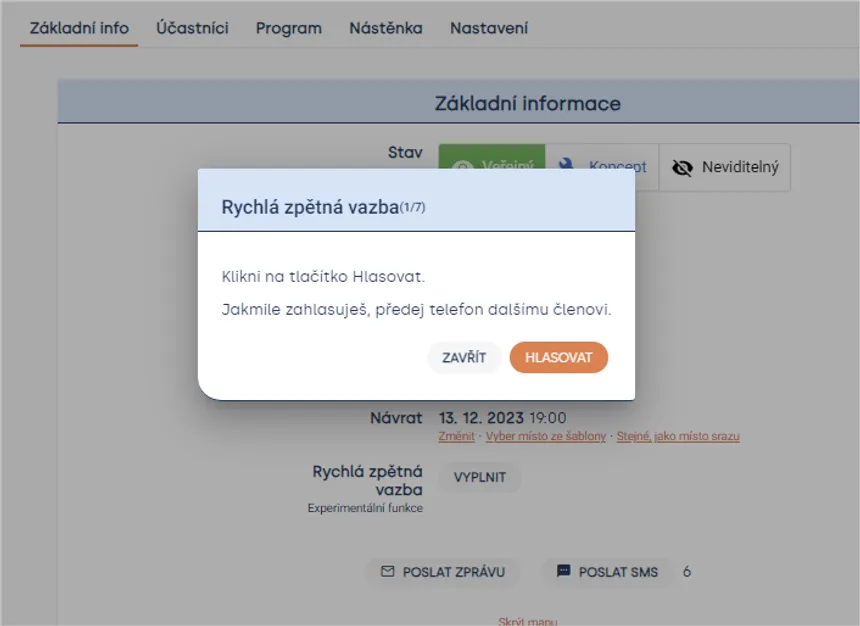
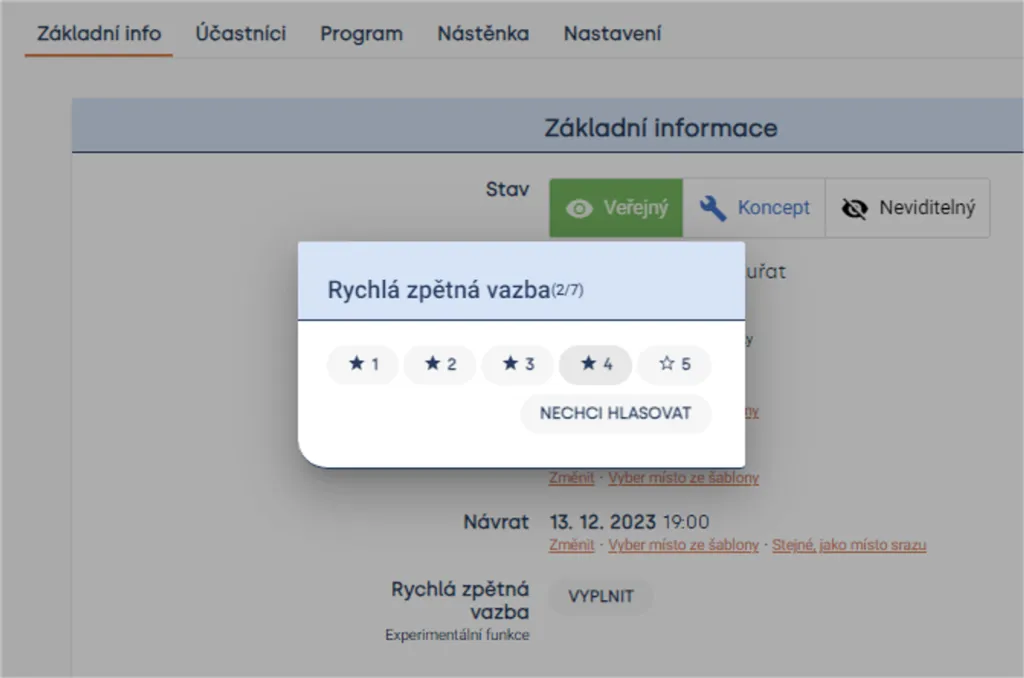
The member should then pass the phone to the next person and after five seconds the option with the “Vote” button appears again so the next member can vote.
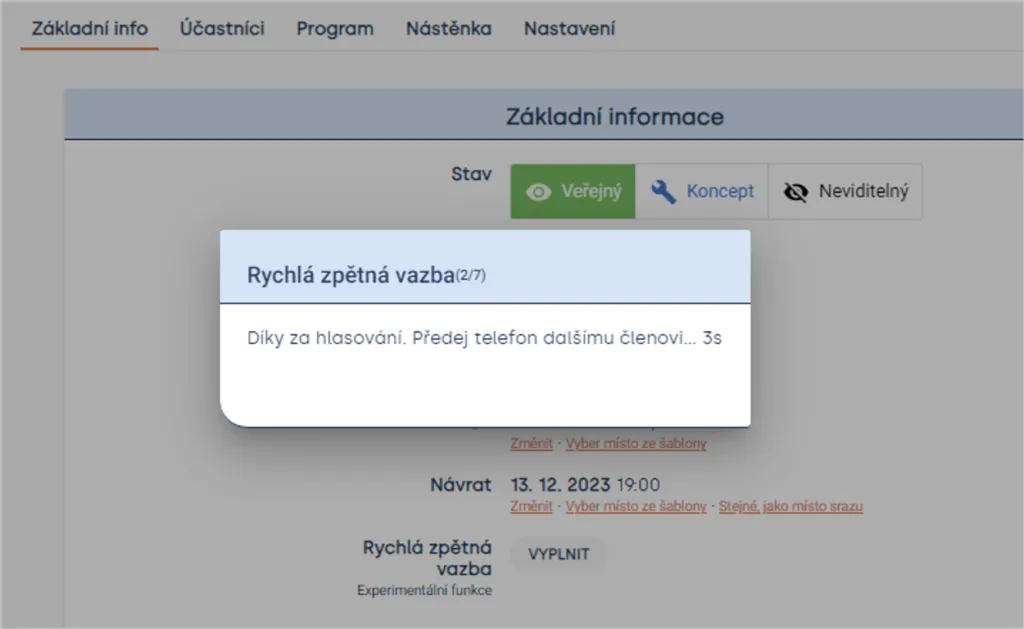
Once feedback is filled in, we send you the results within 24 hours.
Benefits
- You find out how much children liked the event.
- Everyone fills in information anonymously – it cannot be traced who voted how. This increases trust and children will be more willing to fill in information truthfully.
- You can easily compare individual events.
- Attendance must also be filled in to complete feedback. If you make it a ritual at the end of each event, you will always have attendance filled in and won’t need to think about it.
Send message (email, SMS)
Heads up! If you don’t have attendance entered for the event, you cannot send emails or SMS messages.
Emails
When you need to send an email about a specific event, use the “✉️ Send message” button.
You can choose from three message types:
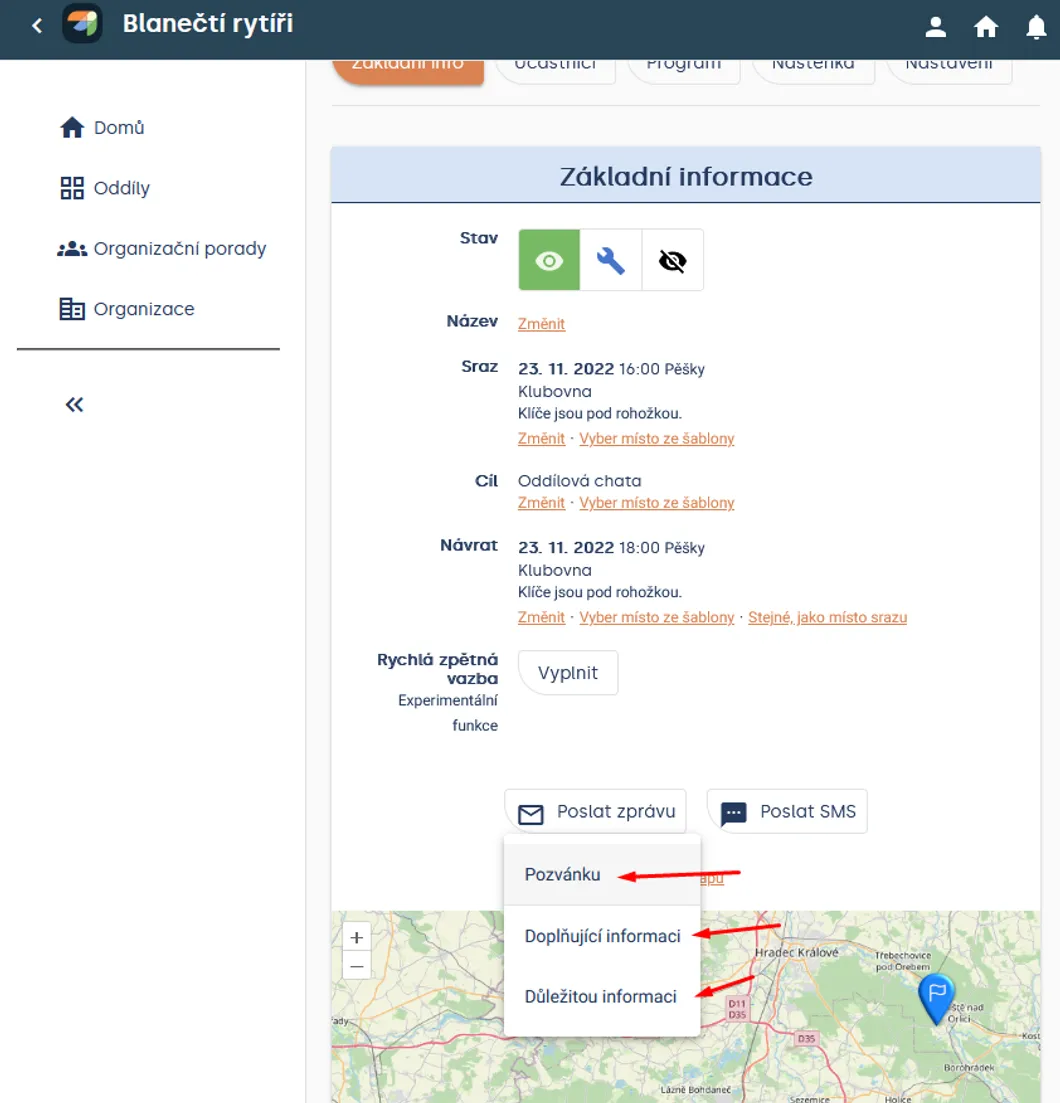
Event invitation
An invitation lets parents and members register for an event. You can send it to all parents and members by clicking the “Send” button. Before sending, you can manually select who the invitation should be sent to. Just click “Select recipients manually” and uncheck who should not receive the invitation. Or you can choose whether it should be sent to everyone (by clicking Recipients: “everyone”) only parents (by clicking Recipients: “parents”) or only members (by clicking Recipients: “members”) Then click the “Send” button.
Heads up! The invitation will be sent to children and parents who:
- have an email filled in
- are invited to the same event you are sending the message about
- have not yet indicated whether they are going
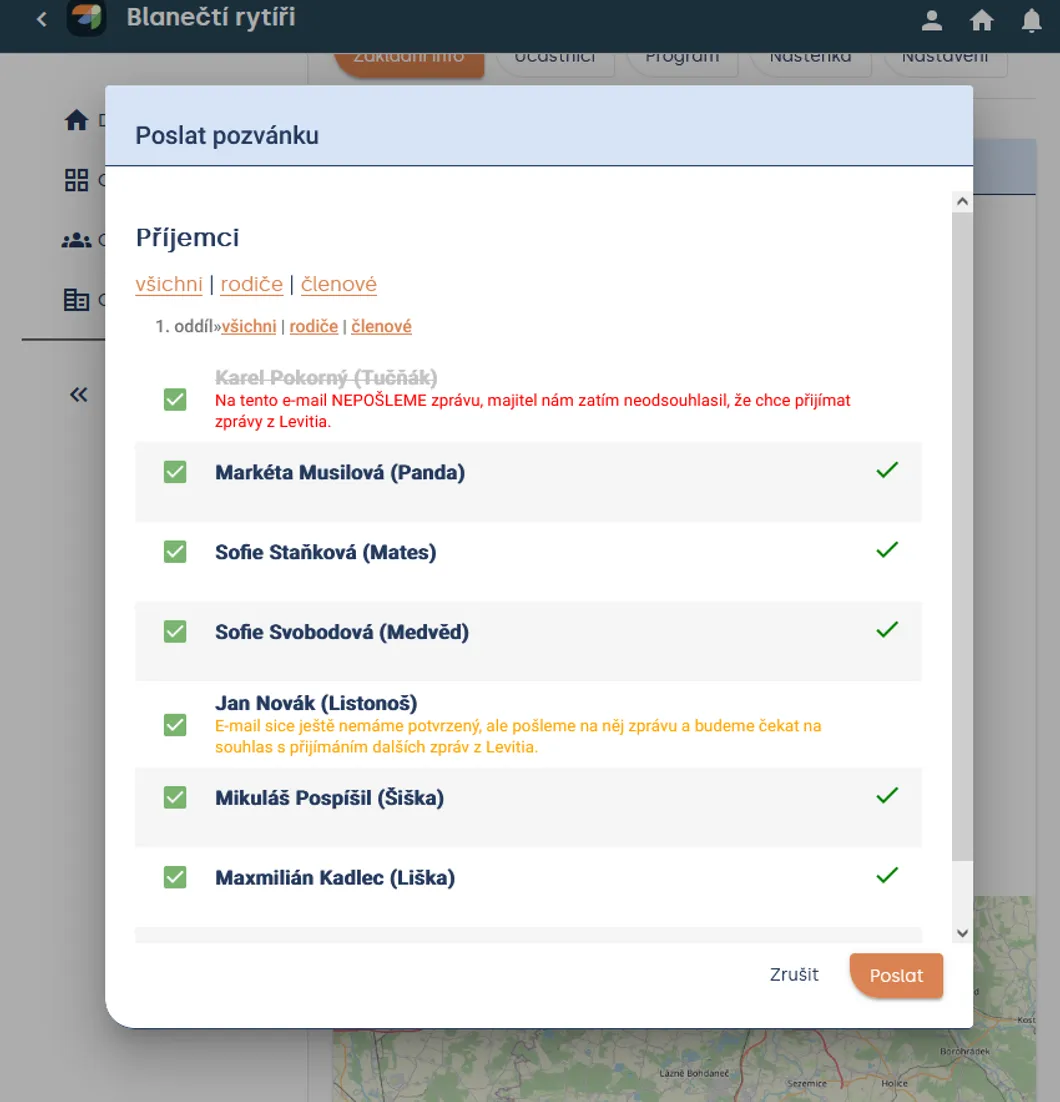
Recipient selection
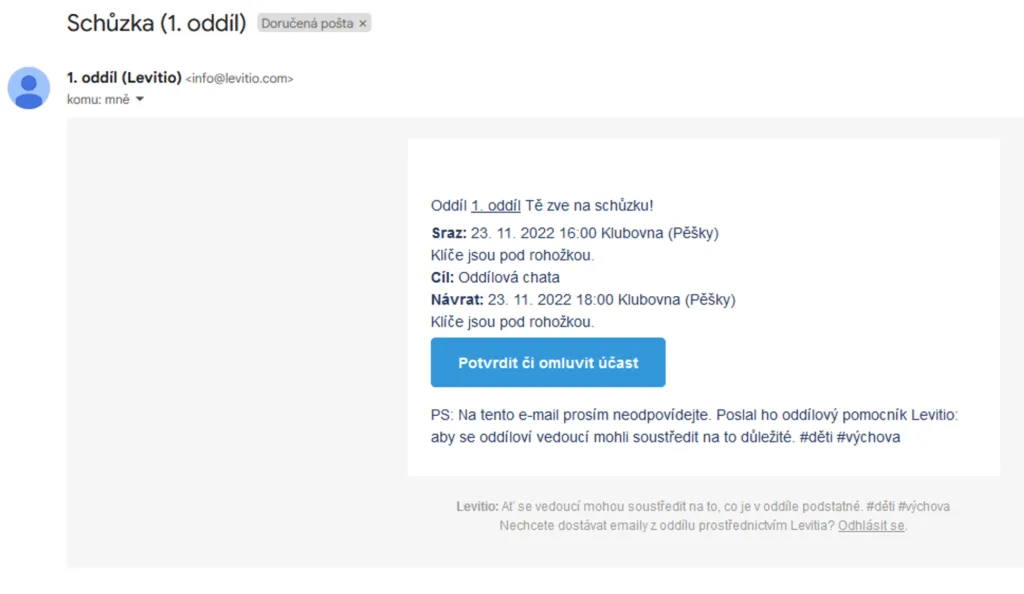
Email with event invitation
Additional information or important message
You can send supplementary information or important information for events. Simply choose one of these types in the selection.
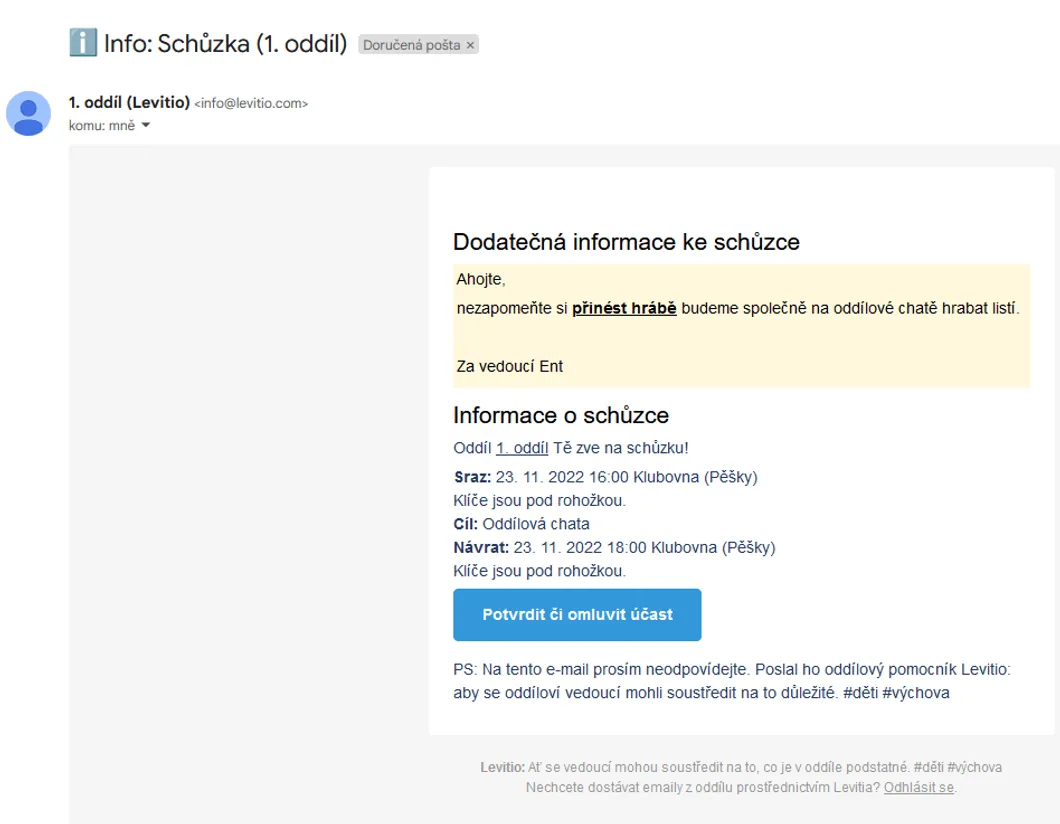
Email with additional event information
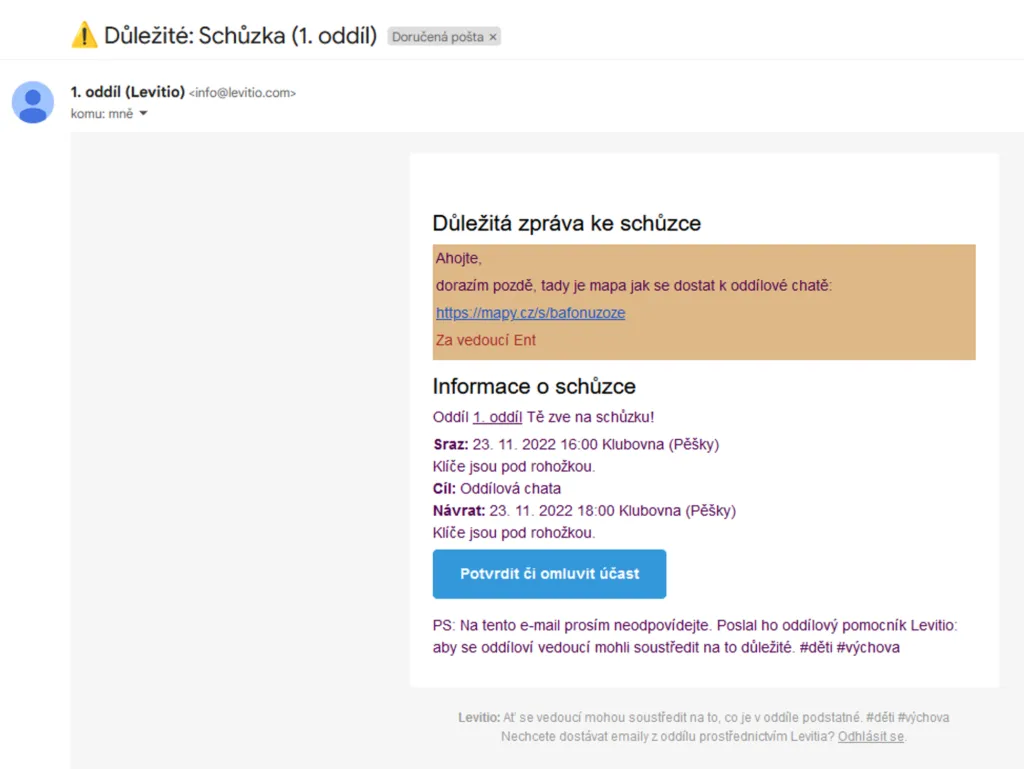
Email with important event message
Here you can also choose from:
- All invited
- All going
- All who haven’t responded yet
- All participants (can be used after the event has taken place)
- Select recipients manually (works the same as for invitations; check who you want to send the message to)
Then just write the email you want to send and click the “Send” button.
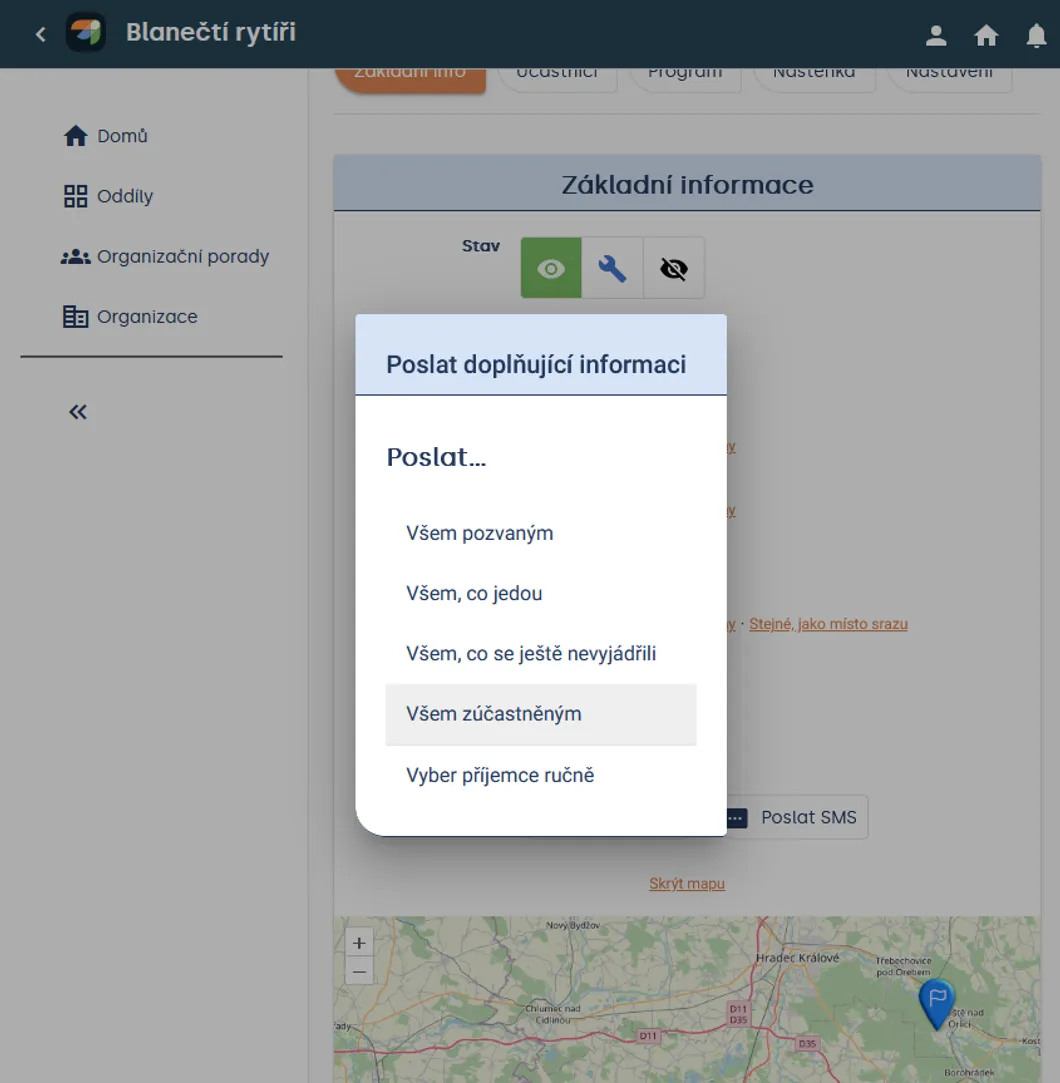
Email recipient selection
🔗 More here: Sending messages to members and parents
SMS messages
Heads up! You can only send SMS messages via phone (doesn’t work on computer or other device without SMS app). By sending SMS messages, you pay your operator the usual SMS fee.
Sending SMS messages is very similar to sending emails. SMS messages can be sent to:
- All invited
- All going
- All who haven’t responded yet
- All participants (can be used after the event has taken place)
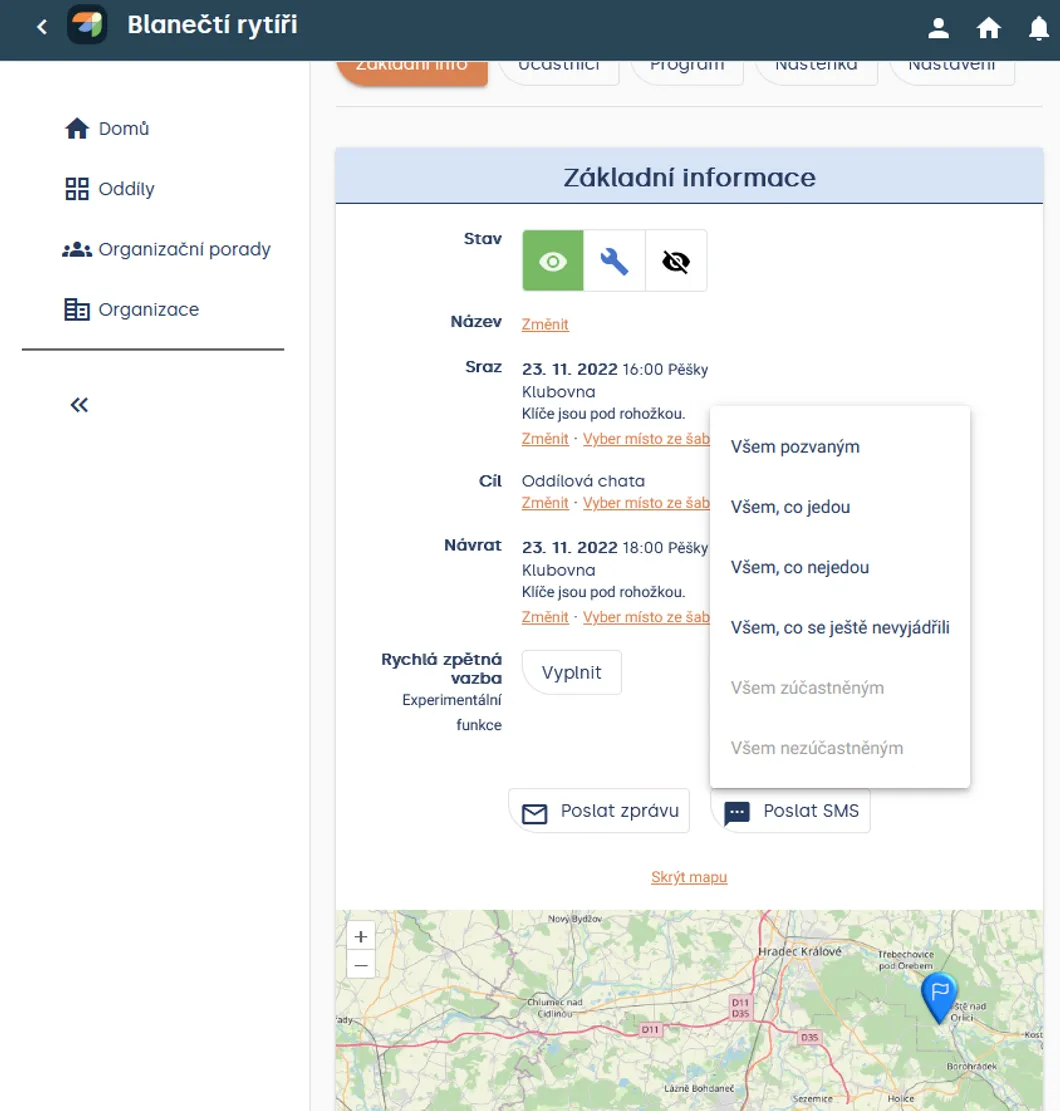
Selecting who the SMS message should be sent to
🔗 More here: Sending messages to members and parents
Packing list
Add the list of items children should bring to the event here. Items are ordered in the list and you add them by selecting the item from the list. Or you can type something else and then confirm adding the item by pressing ENTER. Items can also be moved in the list by grabbing the item name with the mouse and moving it above or below another item. There is also a notes field here if needed.
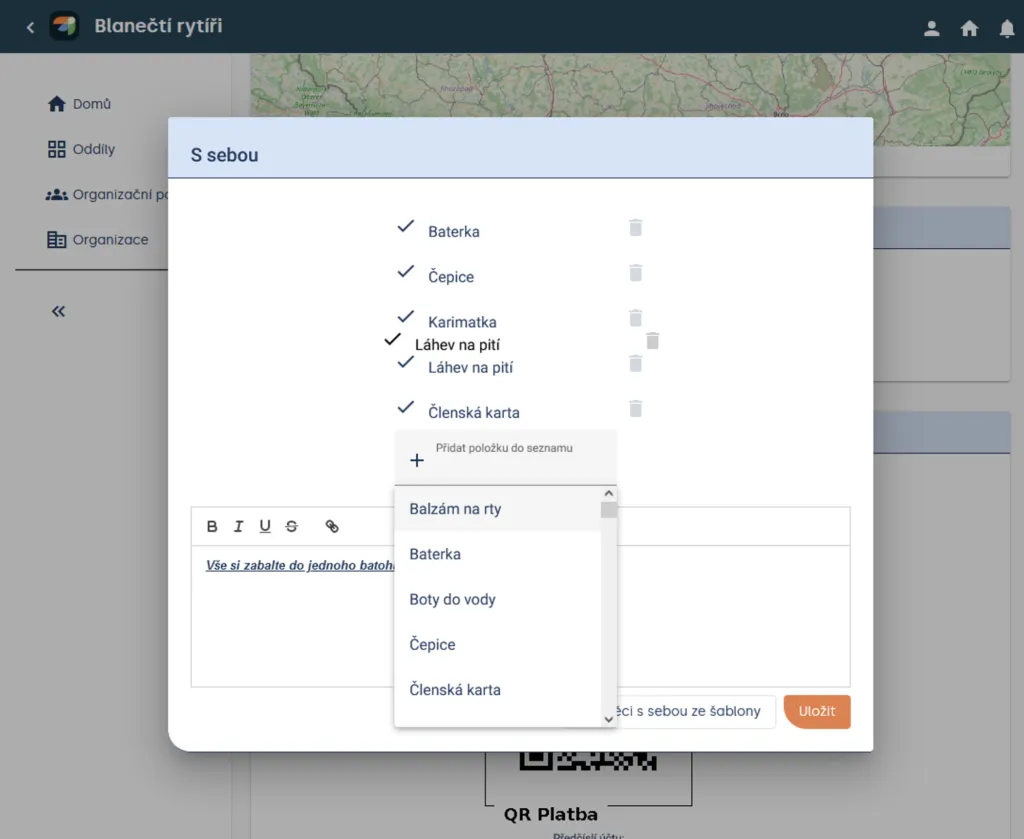
Tip Use packing list templates for entering the item list.
Price
🔗 More information about payments in Levitio: Levitio Pay: payments. Below is how payments work for events:
Levitio lets you collect event fees through a payment gateway. We highly recommend this feature, because it lets parents pay quickly and securely with one click from their phone (Google Pay, Apple Pay, card payment…) and it has many advantages for you too:
- you immediately see who has already paid (payments are automatically synced to Levitio right away)
- you don’t have to chase payments (Levitio sends automatic reminders to those who haven’t paid yet)
- parents immediately receive a payment receipt (you don’t have to write paper receipts at the train station)
- parents can voluntarily increase the payment and donate additional funds to the unit
If you want to use Levitio to collect payments (including recording cash collections), simply click “Create payment” in the Price section:
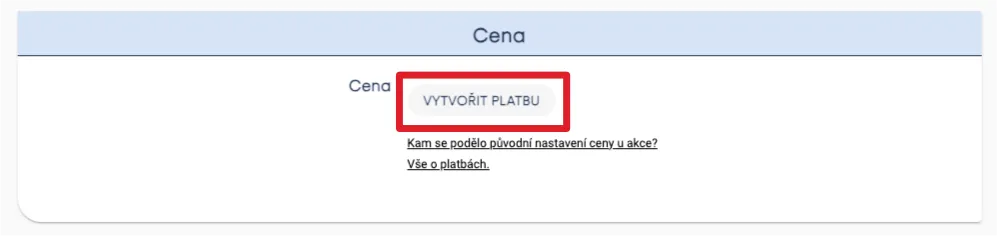
Heads up! Levitio is free for organizations. If you use Levitio Pay, a fee of 5% is charged on the portion up to CZK 1,500 and 3% on the portion above CZK 1,500. Levitio always shows you the fee amount transparently.
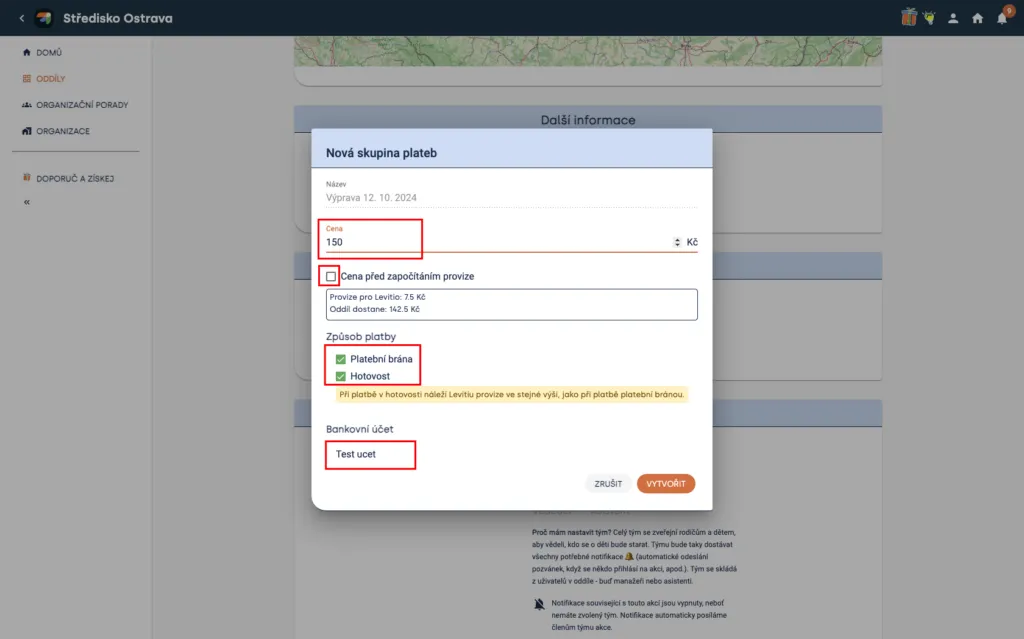
In the next step, set the price, payment methods (payment gateway = parents choose whether to pay by card, Google Pay, Apple Pay, QR code, quick transfer, etc.) or whether you also allow cash collection (e.g. for parents who still prefer cash). Finally, select an approved bank account set in the specific unit / club.
🔗 More here: Adding a bank account
Practical tip
By checking “Price before the fee is included”, you can set it so you receive the configured price in your account. Levitio will then increase the payment for parents by the calculated Levitio Pay fee.
If you don’t check the button, the price you set will be final for parents and the fee will be deducted from this price (so you receive the set price minus the fee).
Payment settings
🔗 More information about payments in Levitio: Levitio Pay: payments
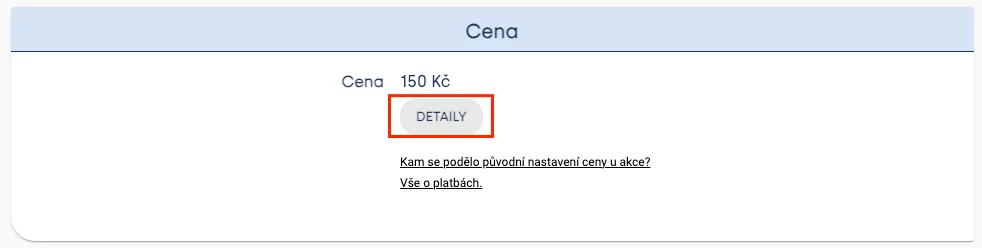
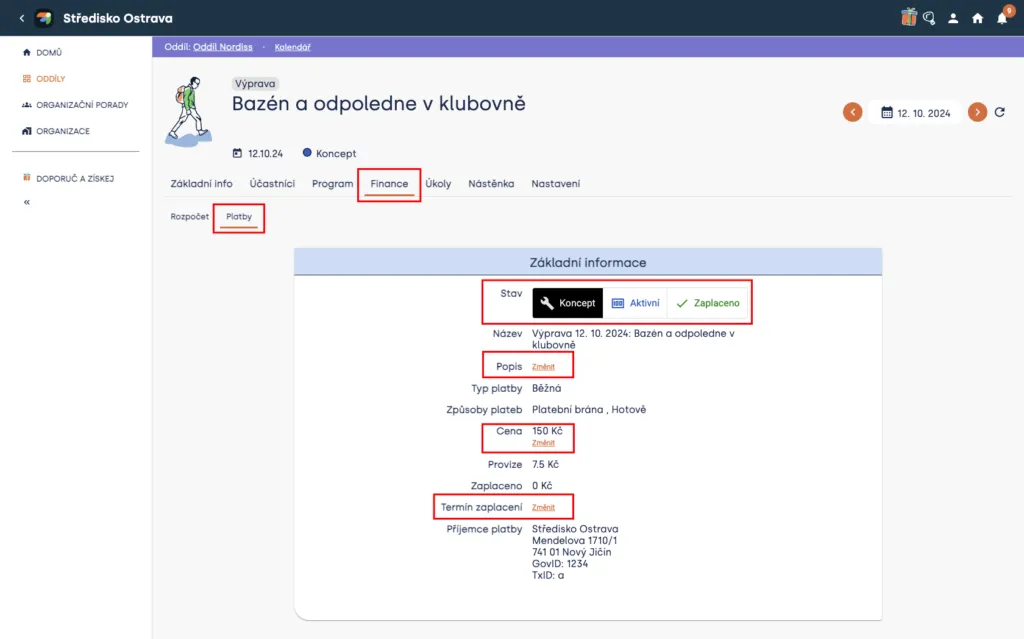
Access payment settings by clicking “Details” or through the menu: Section: Unit > Calendar > Selected event > Finance > Payments
In payment settings, you can change Event status:
- Draft/Invisible – parents don’t see the payment at all (for a trip they only see the price) and cannot pay it
- Active – payment is possible normally
- Paid – everyone has paid
You can also add Description, change Price, and add Payment deadline.
Practical tip Once you set an event status to “Public” (registration is possible), the payment status automatically switches to “Active” (payment is possible).
Who should pay?
For events, payment is automatically enabled for everyone who is invited and signed up. Therefore, in the settings below, you don’t need to add members manually.
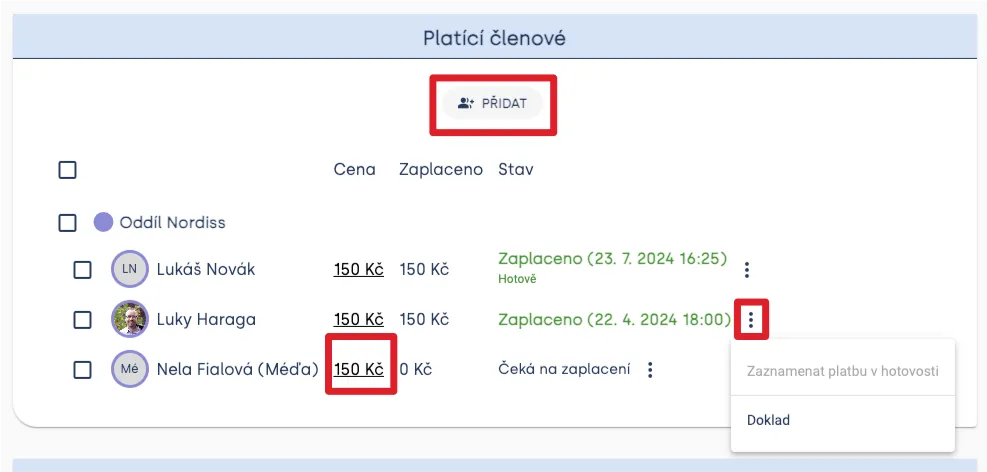
For displayed members (who have paid or whom you added manually), you see payment status:
- Paid (+ exact time; automatically synced from payment gateway)
- Paid in cash (you can mark manually by clicking three dots)
- Awaiting payment
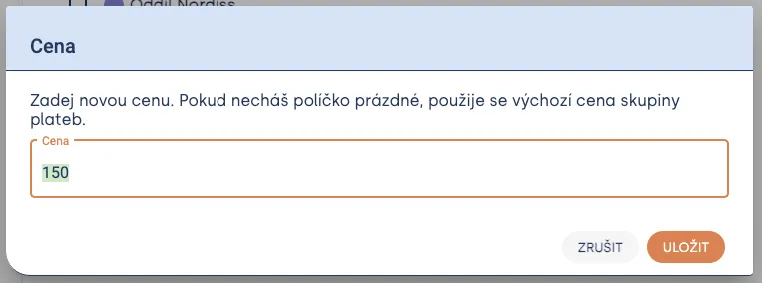
Tip You can manually adjust the price for individual members (e.g. sibling discount, etc.). In that case, first add these members to the list (“Add”), then click the price for the given member and overwrite the value.
Contact
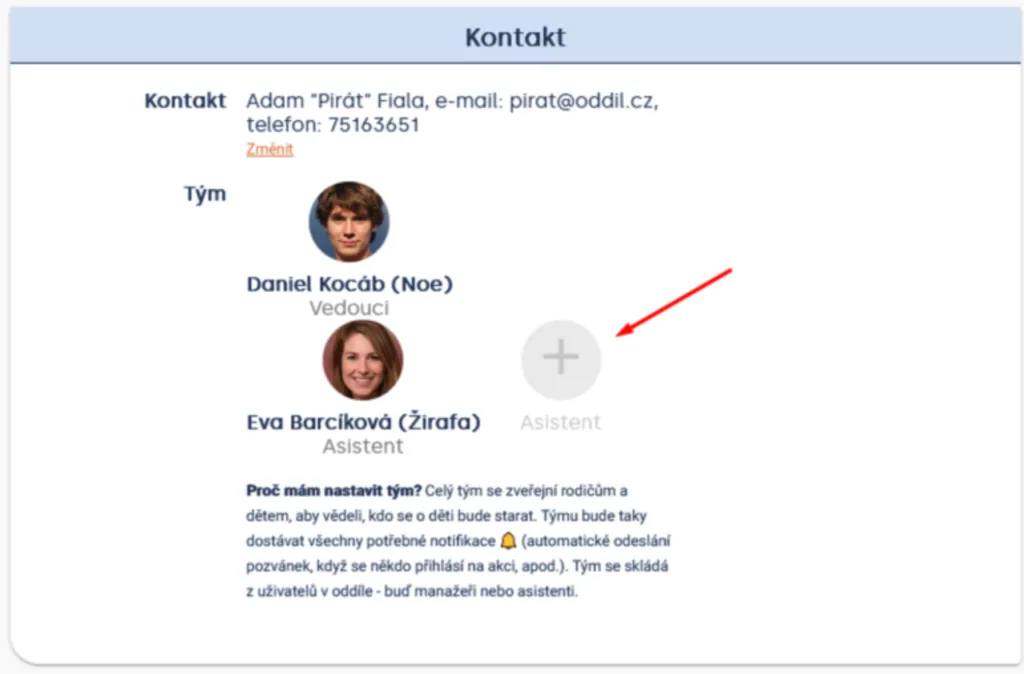
This field lets you write contact information for the leader who will lead the event.
Team
Add a leader to the team by clicking plus (➕). Only one leader can be added. The entire team is then visible on the parent portal. The team will also receive all necessary notifications about the event (automatic sending of invitations, when someone registers for the event, etc.). The team consists of users in the unit – either managers or assistants.
Heads up! If you don’t have a team selected for the event, notifications for the given event will be disabled.
Related articles
Events
Creating events
Before you start creating events, it's good to clarify the differences between event types.
Events
Google Calendar sync
You set up the Google Calendar connection in a specific unit / club. Synchronization may not appear immediately.
Events
Inviting members to an event
After creating an event, check who is invited and send the invitation from the event detail. The parent or member receives a link where they can confirm attendance or excuse the child.
Events
Event program
For an event you can prepare a timed program in Levitio and split it into individual activities. You can save repeated activities as templates.
Events
Hranostaj & Levitio
Find a game in the Hranostaj database and drag it straight into your meeting, trip, or camp program. No copy pasting or jumping between apps.